Window Cleaning Bucket on a Belt Setup for Pros

Table of Contents
Your bucket on a belt is the interface between your tools and your speed. A bad rig costs you minutes per window — wet leg, tools shifting on the ladder, back pain by 2 PM. A good one disappears. You stop thinking about it and just clean glass.
Most BOAB problems come down to three things: wrong bucket for your squeegee, poor belt choice, and sloppy positioning. Fix those and you fix the rig. Here's how.
Why a BOAB Matters More Than You Think
A bucket on a belt keeps your tools on your hip so you can maintain three points of contact on the ladder. That's the safety argument, and it's non-negotiable. But the productivity case is just as strong: a properly configured BOAB cuts trips to the floor bucket by 40–60% on residential work. Over an eight-hour day, that's significant fatigue reduction and faster cycle times.
The BOAB isn't a replacement for your floor bucket — it's a ready-use reservoir. It holds enough solution to keep your washer sleeve saturated between windows so you're not climbing down for every pane. In commercial settings, it's essential for navigating tight spaces where a floor bucket is a trip hazard.
Mounting Systems: Loops, Clips, and Quick-Release
Fixed-loop systems lock the bucket to your belt — maximum stability, zero chance of accidental release. Detachable-clip systems let you shed the bucket without removing the belt, which matters during breaks or when you switch to water fed pole work. Quick-release is standard on professional-grade models and worth insisting on: if your bucket snags on a ladder rung, you need it gone instantly.
Reservoir depth has to match your washer size. Running 18-inch washers in a bucket designed for 14-inch tools means the washer tips, drips, and defeats the purpose of the rig.
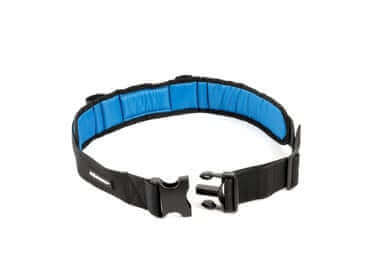
The Belt: Your Rig's Chassis
Leather belts stretch when wet and sag under load. That sagging is what causes wet leg — the bucket tilts, water sloshes onto your thigh every step you take. Heavy-duty nylon webbing holds its shape wet or dry, keeps holsters in position, and keeps the bucket vertical.
Weight distribution matters more than most cleaners realize. Place your bucket on your non-dominant hip and counterbalance with your scraper holster and accessory pouches on the opposite side. Without that counterbalance, the belt pulls down on one hip all day — a reliable path to lower back pain on high-volume routes.
Choosing the Right Belt
Look for padded nylon, 2-inch width, and a safety-release buckle that requires a deliberate squeeze to open. The 2-inch width is critical: most bucket clips from Ettore, Unger, and Moerman are designed for it. Narrower belts let the bucket flop. Thicker belts won't accept the clips.
The Moerman Comfort Belt is purpose-built for this — padded, wide, and compatible with all major clip systems. The two-loop belt is another solid option if you prefer a simpler fixed-loop approach.
Essential Belt Accessories
A complete rig needs a scraper holster with a secure locking mechanism (blades falling at height is not a risk you take), a dry pouch for detailing towels positioned on the opposite hip from the wet bucket, and a steel wool pouch to keep your 0000 grade dry and ready. Organize so you can reach every tool without looking — eyes on the glass, hands on the ladder.
BOAB Models: What Actually Matters
Three models dominate the professional market right now, and each solves a different problem.
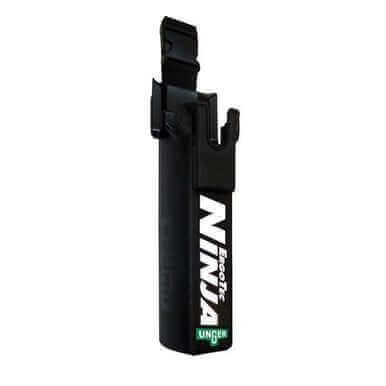
Unger Ninja BOAB
The Unger Ninja BOAB is the customization king. Its swivel mechanism keeps the reservoir level as you move, which reduces spills. It's designed for wide-body squeegees — if you run Unger Ninja channels or similar wide-profile setups, this is the natural match. The swivel adds a small amount of bulk, but the spill reduction is worth it on ladder-heavy days.
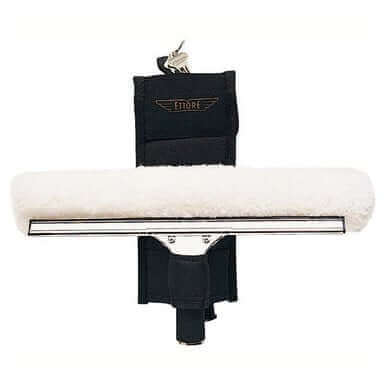
Ettore Sidekick
The Ettore Sidekick is the workhorse. Detachable clip system, accommodates classic brass and stainless handles, rugged construction. No swivel, no drip catcher — just a reliable bucket that clips on and off without removing the belt. At its price point, it's the right starting point for a new business owner building their first professional rig.
Moerman Side Bucket 2.0
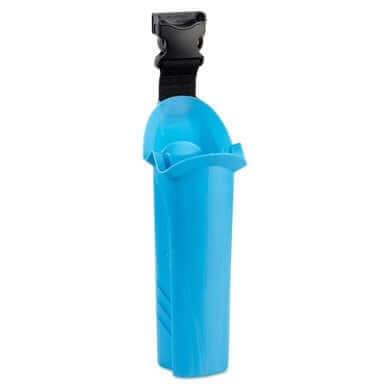
The Moerman Side Bucket 2.0 addresses the wet leg problem directly with its integrated drip management. If you've spent years dealing with soaked trousers by midday, this is the hardware fix. Symmetrical mounting points make it ambidextrous — equally comfortable on either hip for left- or right-handed cleaners.
The Hybrid Rig Approach
Experienced cleaners rarely run a single brand head to toe. A common professional rig: a padded Moerman belt for comfort, an Ettore Sidekick for the brass squeegee, and a Moerman Tool Holder for detailing cloths. Cross-brand compatibility is a sign of someone who prioritizes function over loyalty to any one system.
Squeegee Compatibility
Not every squeegee fits every bucket. Wide-body channels (Unger Ninja, etc.) need a wider mouth than slim-profile buckets offer. If you carry two sizes — say a 12-inch for French panes and an 18-inch for picture windows — you need double-loop capacity. Don't heat-mold plastic loops to force a fit; heat makes the plastic brittle and creates a failure point you'll discover at the worst possible time.
Ergonomics and the Wet Leg Fix
Place the bucket on your non-dominant hip. Right-handed cleaner: bucket on the left. This creates a natural cross-draw — your dominant hand reaches across your body to retrieve the washer, a faster and more stable motion than same-side draw, especially on a ladder.
Height calibration: the top of the bucket should sit just below your hip bone. Too low and it bangs your thigh on every rung. Too high and the squeegee handle digs into your ribs when you lean.
Solving Wet Leg for Good
Before holstering your washer, squeeze the sleeve against the inner wall of the bucket. This removes the excess solution that would otherwise drip down your leg. For additional protection, place a small natural sea sponge at the bottom of the reservoir as a baffle — it absorbs slosh during rapid movement and ladder transitions.
Combined with a drip-managed bucket like the Moerman Side Bucket 2.0, these techniques eliminate wet leg entirely. It's a solved problem if you're willing to address it with both technique and hardware.
Keeping Detailing Towels Dry
Your microfiber towels must stay bone-dry. Position your dry pouch on the opposite hip from the wet bucket — that physical separation is your first defense. Even a slightly damp microfiber leaves moisture trails on glass. If you're getting streaks on detail work, check your towel pouch placement before blaming your technique.
Building Your Rig
Starter Rig
New to the trade: a rigid nylon belt, a reliable bucket (the Ettore Sidekick is hard to beat at its price), a dual nylon holster for your scraper and squeegee, and a dry pouch. Professional-grade components from the start — equipment failure on a job site costs more than the price difference between pro and consumer gear.
Scaling Up
As volume increases, upgrade from a basic bucket to one with swivel or drip management. Add a second squeegee loop for carrying two sizes. Consider a dedicated BOAB for commercial route work where speed through storefronts matters. Scaling is about reducing cycle time per window without adding fatigue or sacrificing safety.
Maintenance
Clean your reservoir weekly — stagnant water and soap residue grow mold and degrade plastic. Inspect clips weekly; replace every 6–12 months depending on volume. When the plastic turns white at flex points or the clip feels loose, it's done. Keep spares in the truck. A replacement clip set costs a few dollars; a dropped tool from height costs much more.
Products Mentioned
 Comfort Belt for Tool Holder Moerman SKU: 50-82 | 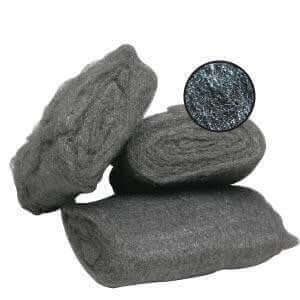 ProTool Steel Wool Bag 0000 SKU: 26-20 | |
 Holster Bucket on a Belt NINJA Unger SKU: 48-24 | 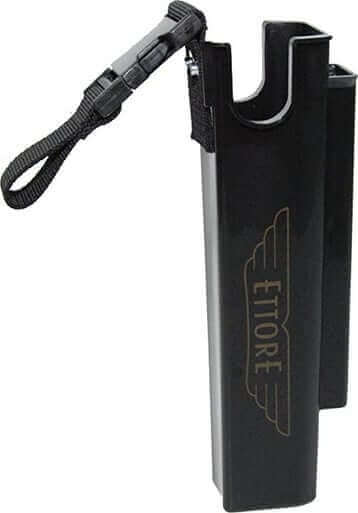 Holster Sidekick Black w/detach clip SKU: 48-11 |  Side Bucket on a Belt 2.0 Moerman SKU: 48-810 |
 The Tool Holder Classic Moerman SKU: 48-85 | 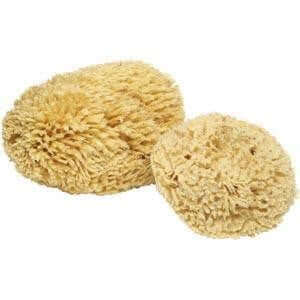 Florida Natural Sea Sponge SKU: 22-1M | 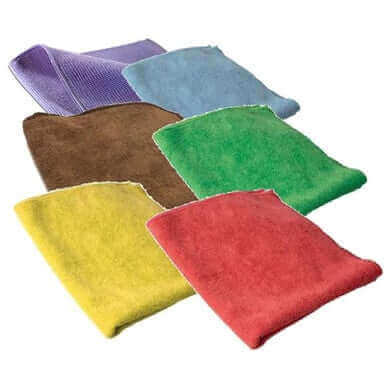 ProTool Microfiber Towel SKU: 24-5M |
 Holster Dual Nylon Ettore SKU: 49-12 |  Holster Bucket on a Belt Classic Unger SKU: 48-21 | 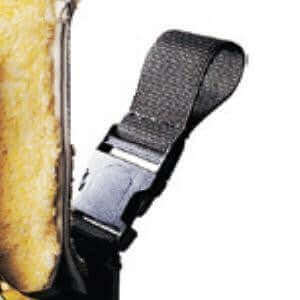 Clip Male/Female Ends Sidekick Ettore SKU: 48-13 |